zabbix自写脚本搭建 1、你用过哪些监控软件? 1、cacti Cacti是一套基于PHP,mysql,snmp,RRD tools开发的检测图形分析工具。Cacti是使用轮询的方式由主服务器向设备发送数据请求来获取设备上转台数据信息。如果设备不断的增多,轮询就非常耗时,监控平台重要的东西就是实时性,如果一个监控的数据不具备实时性,那么这个监控就毫无意义,cacti因为轮询消 耗时间过长,导致无法获取设备的新状态,所以cacti在大规模的监控场景,能力有限。cacti在早期的时 候不支持数据异常报警。
2、nagios Nagios是一款开源的免费网络监控报警服务,能监控windows,linux,unix等主机状态和主机信息。而且 nagios可以根据监控获得的数据第一时间进行报警。nagios扩展性非常好,支持数万台服务器或者上千台网 络设备的监控。nagios无法将多个相同应用及的数据整合起来,也不能监控到集群中特殊节点的迁移和恢复。
3、ganglia 目前用于hadoop平台的监控,不做过多评价
4、zabbix 1.zabbix是一个基于web界面的提供分布式系统监控以及网络监控功能的企业级开源解决方案。zabbix能监控各种网络参数,保证服务器系统的安全运行,并且能够提供灵活的通知报警机制让系统管理员能快速的发现 问题,定位问题,解决问题.
2.zabbix除了支持主动模式之外还支持被动模式。所谓的主动还是被动针对的是agent,agent向zabbix的 server发送数据,就表示是主动模式,agent被动的等待server来提取数据,就是被动模式。
3.zabbix支持分布式的架构,可以采用zabbix proxy的方式来实现监控平台的轻松扩容,可以简单的实现 多数据中心多云平台监控。你想要扩容,搭建zabbix proxy即可。
4.zabbix支持多种报警,短信(SMS),邮件,语音,微软的team,企业微信,钉钉….
5.zabbix有非常漂亮的web界面(相对的),但是又不仅仅只是显示监控的数据,还可以通过web对监控内容进行调整和配置,还支持多用户访问,以及外部身份认证域的集成。
6.zabbix是免费的。是开源的,是对公众可以任意使用的。虽然zabbix是开源的免费的,但是如果运维人员的水平不够可能也没办法发挥zabbix的全部功能,一般对于开源监控平台来说,如果想玩到高级的程度,必须要具备开发的知识。这个知识针对中小型的公司,需要运维人员对监控平台进行维护和问题发现以及问题处理,对开发人员要求动态实时的定制需要监控的内容。所以说商机就来了,有很多公司提供zabbix的技术支持,zabbix社区就是这些众多提供商业支持的大的一家公司。
5、上述监控工具的区别 nagios的图形也不好看,虽然可以安装图形插件,但是也不好看。nagios如果需要图形,也可以和cacti配合使用。cacti虽然监控效率低下,但是图形比nagios好看。如果采用nagios和zabbix对网络节点进行监控,那么他们因为是并发的监控,所以对cpu的要求很高(其实也不是特别高),是高是低取决于你设置的监控项的数量,以及监控数据提取周期。zabbix相比于nagios在功能上和性能上都强大一些。zabbix的图形比nagios要好看(相对的)。zabbix支持分部署。zabbix支持web配置,配置简单,zabbix支持自动发现 (我们一般会使用xml文件批量导入代替自动发现)
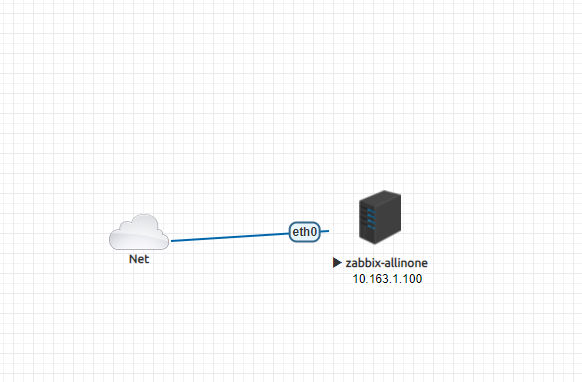
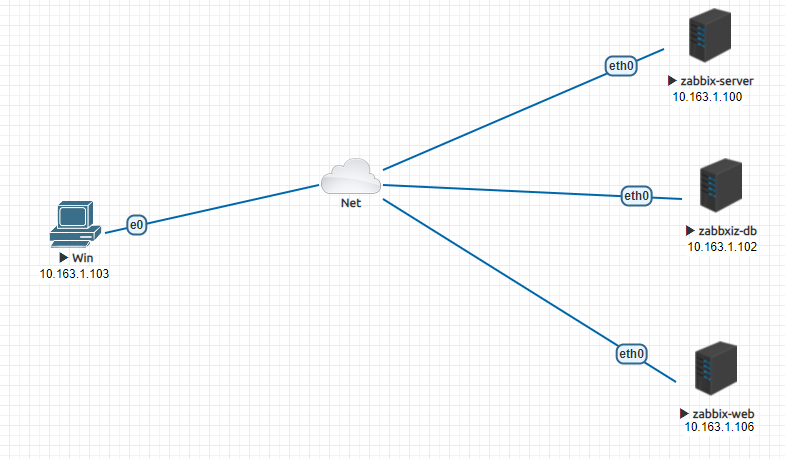
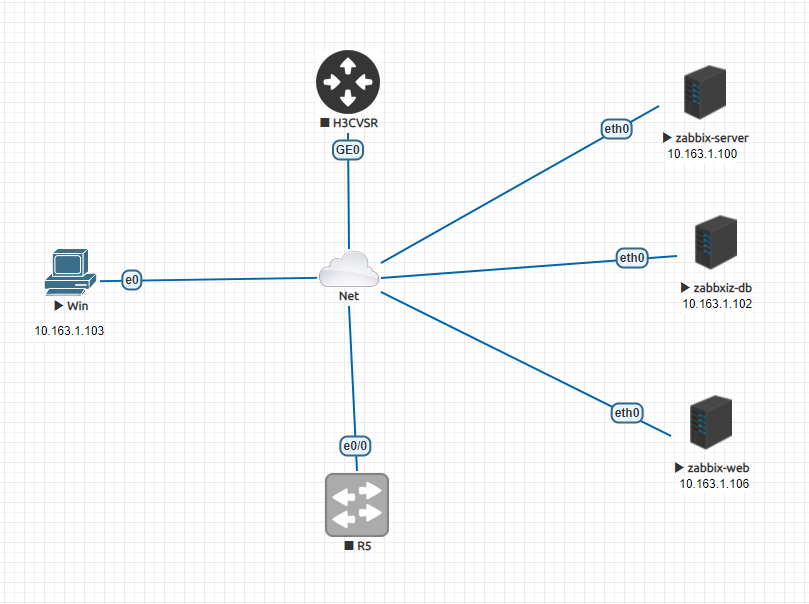
2、zabbix的allinone安装 1、拓扑
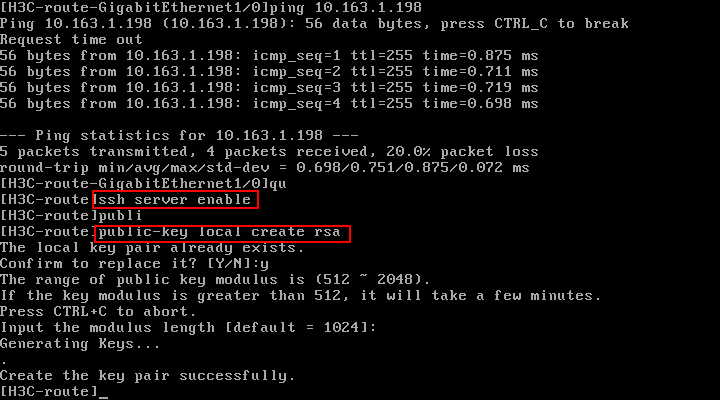
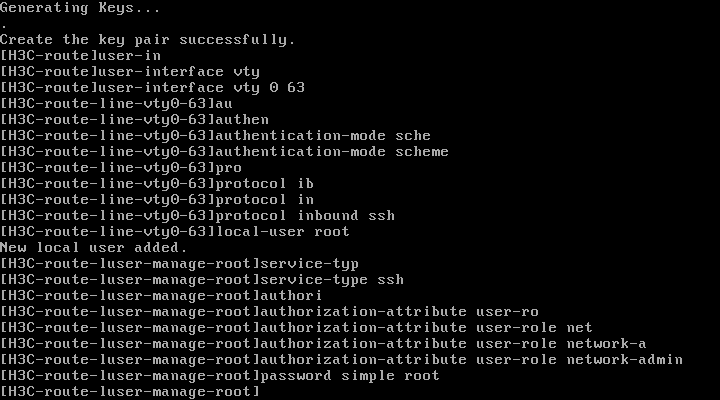
2、连接上ssh 1 2 3 4
3、zabbix server系统基础配置和软件仓库准备 选择国内的清华大学开源镜像站,作为zabbix软件仓库
1 2 3 4 5 6 7 8 9 10 11 12 13 14 15 16 17 18 19 20 21 22 23 24 25 26 27 28 29 30 31 https://mirrors.tuna.tsinghua.edu.cn/zabbix/zabbix/5.0/rhel/8/x86_64/END [BaseOS] name=baseos baseurl=https://mirrors.tuna.tsinghua.edu.cn/centos/8/BaseOS/x86_64/os/ gpgcheck=0 enabled=1 [AppStream] name=AppStream baseurl=https://mirrors.tuna.tsinghua.edu.cn/centos/8/AppStream/x86_64/os/ gpgcheck=0 enabled=1 [epel] name=epel baseurl=https://mirrors.tuna.tsinghua.edu.cn/epel/8/Everything/x86_64/ gpgcheck=0 enabled=1 [zabbix] name=zabbix baseurl=https://mirrors.tuna.tsinghua.edu.cn/zabbix/zabbix/5.0/rhel/8/x86_64/ gpgcheck=0 enabled=1 END
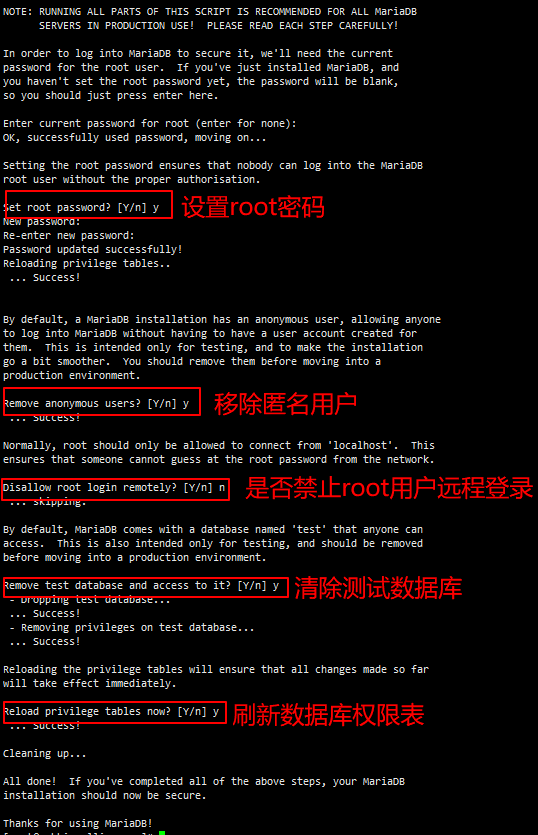
4、zabbix数据库的安装 1 2 3 4 5 6 7 yum install mariadb-server -yenable mariadb --now
1 2 3 4 5 6 7 8 9 10 11 set utf8 collate utf8_bin;'%' identified by 'zabbix' ;'10.163.1.103' identified by 'zabbix' ;
安装zabbix-server-mysql软件,将该软件提供的zabbix数据库模板导入新建的zabbix数据库中
1 2 3 4 5 6 7 8 9 10 yum install -y zabbix-server-mysql"use zabbix;" -e "show tables;"
5、zabbix的server部署 1 2 3 4 5 6 7 8 9 10 11 12 13 14 15 16 17 18 19 20 21 22 23 24 25 26 27 log /zabbix/zabbix_server.loglog /snmptrap/snmptrap.log's/SELINUX=enforcing/SELINUX=disabled/g' /etc/selinux/configdisable firewalld --nowenable zabbix-server --now
6、zabbix-web的部署 选择lnmp的架构部署zabbix-web
1 2 3 4 5 6 7 8 9 10 11 12 's/^#.*listen.*/ listen 80;/' /etc/nginx/conf.d/zabbix.conf's/^#.*server_name.*/ server_name 10.163.1.100;/' /etc/nginx/conf.d/zabbix.conf's/; php_value\[date.timezone\] = Europe\/Riga/php_value\[date.timezone\] = Asia\/Shanghai/g' /etc/php-fpm.d/zabbix.confenable nginx php-fpm --now
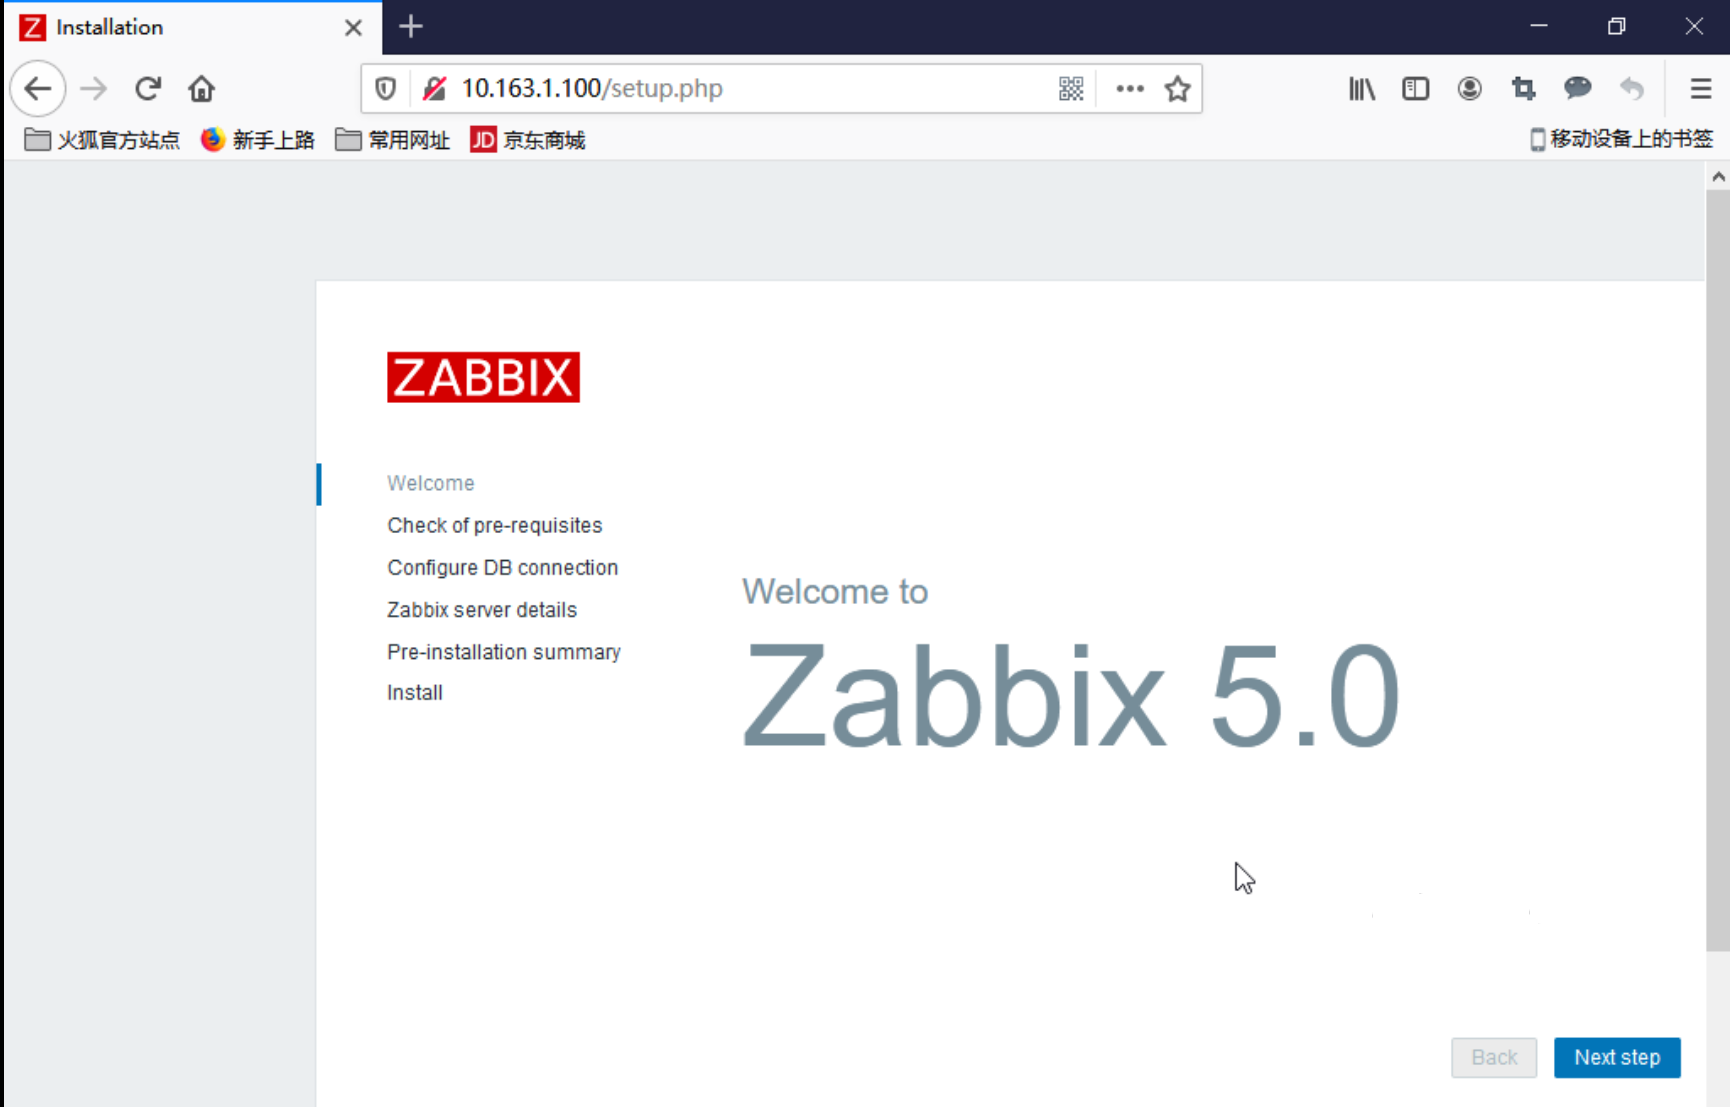
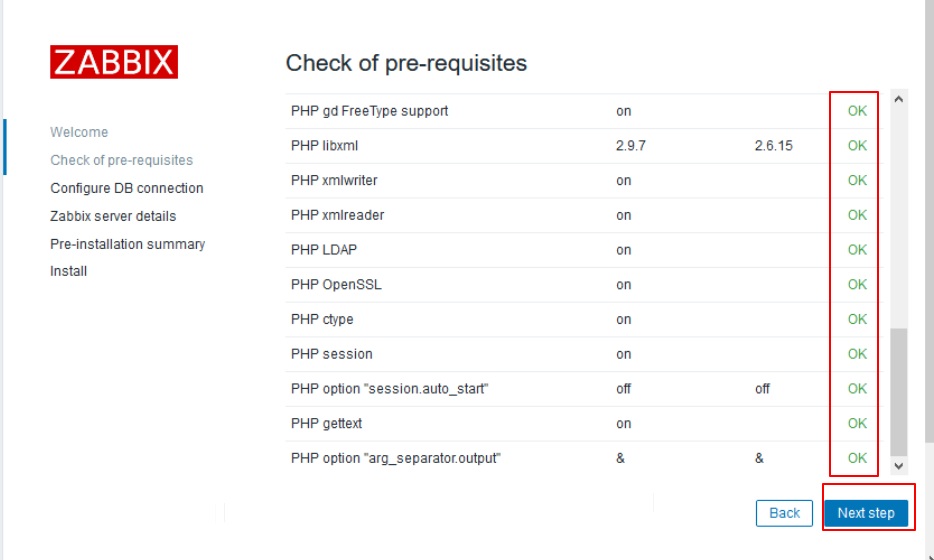
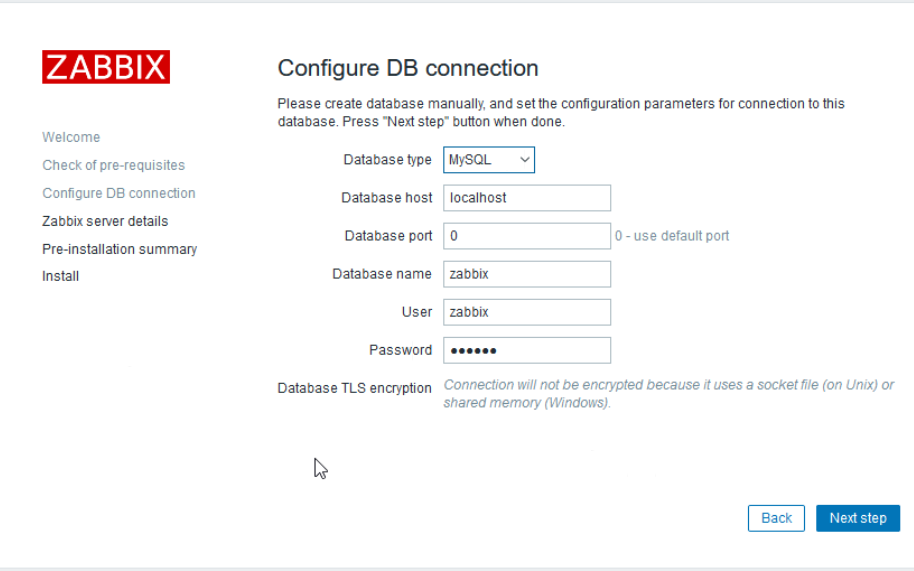
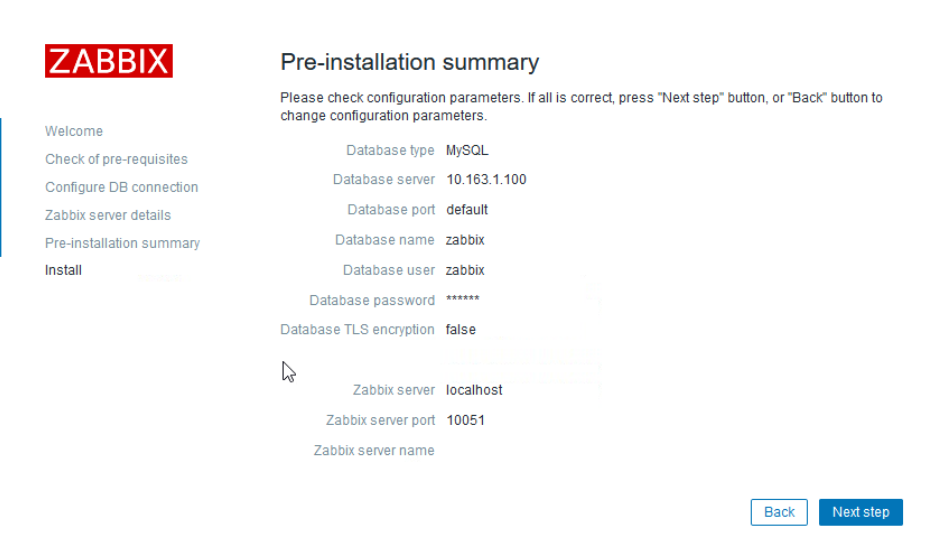
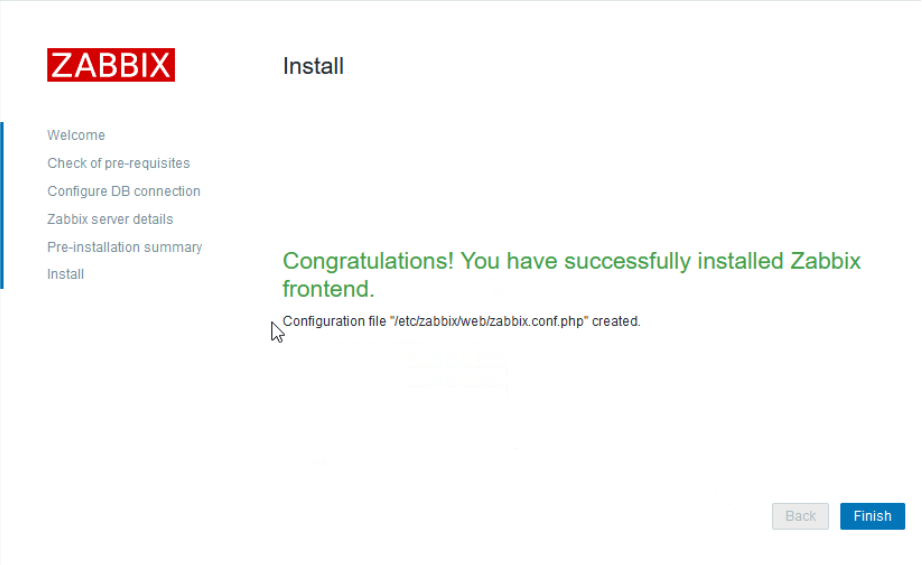
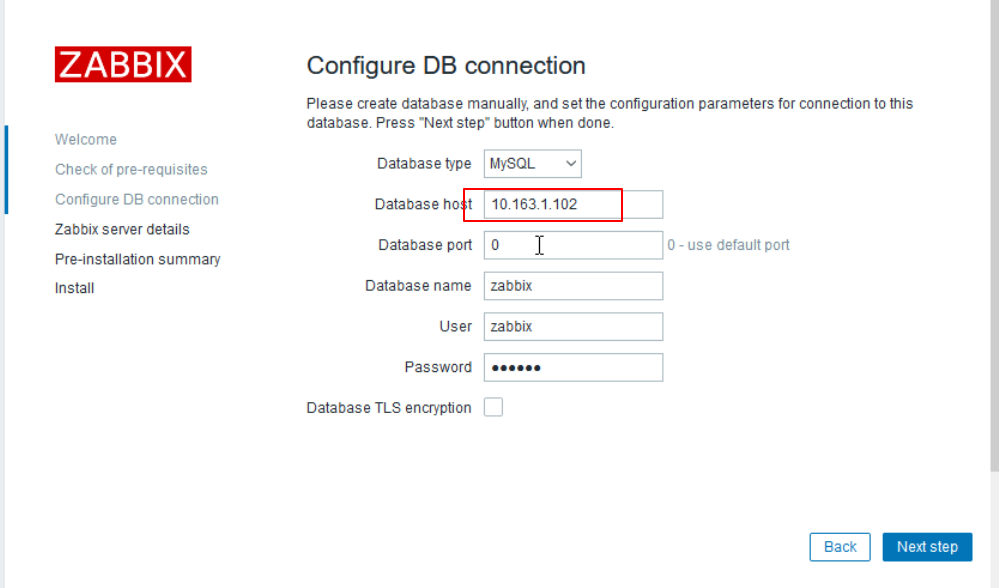
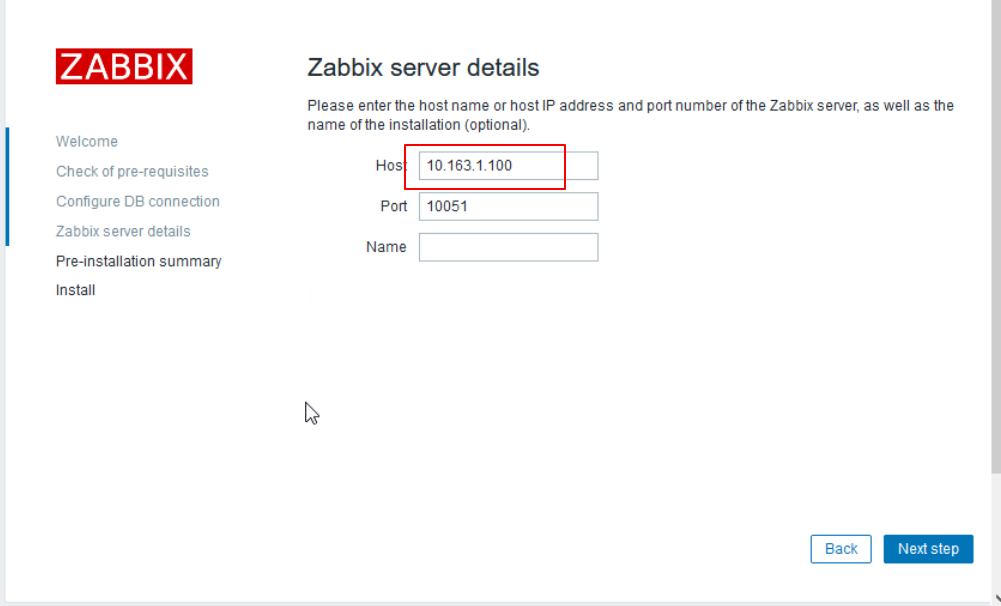
7、访问zabbix-web来配置zabbix-web连接zabbix-db和zabbix-server
上面的操作生成了/etc/zabbix/web/zabbix.conf.php这个配置文件
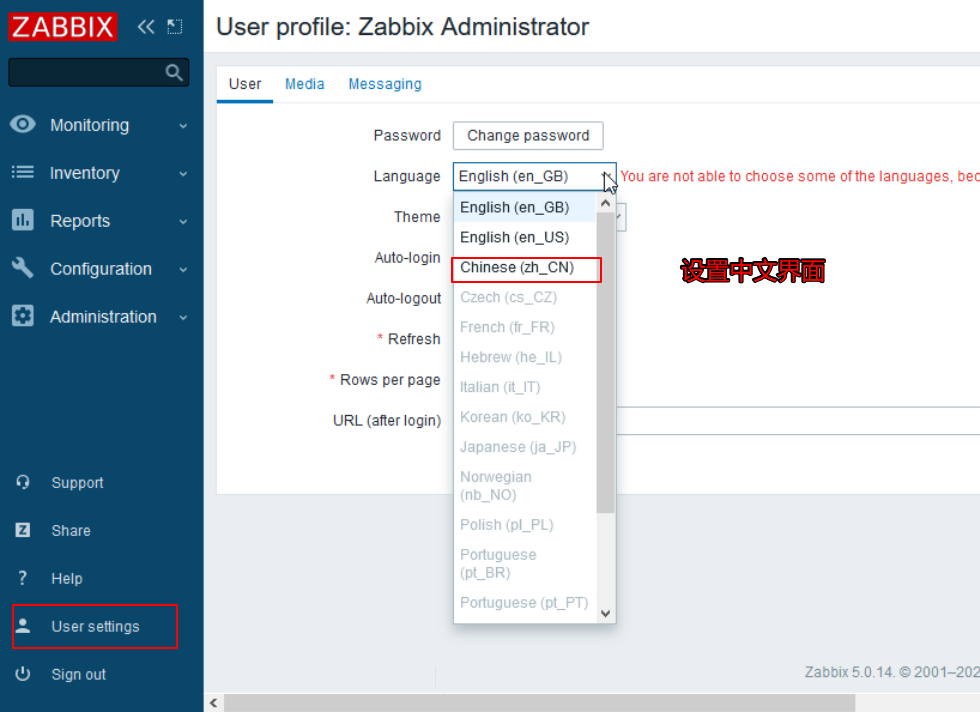
默认的账号是Admin,密码是zabbix
1 2 3
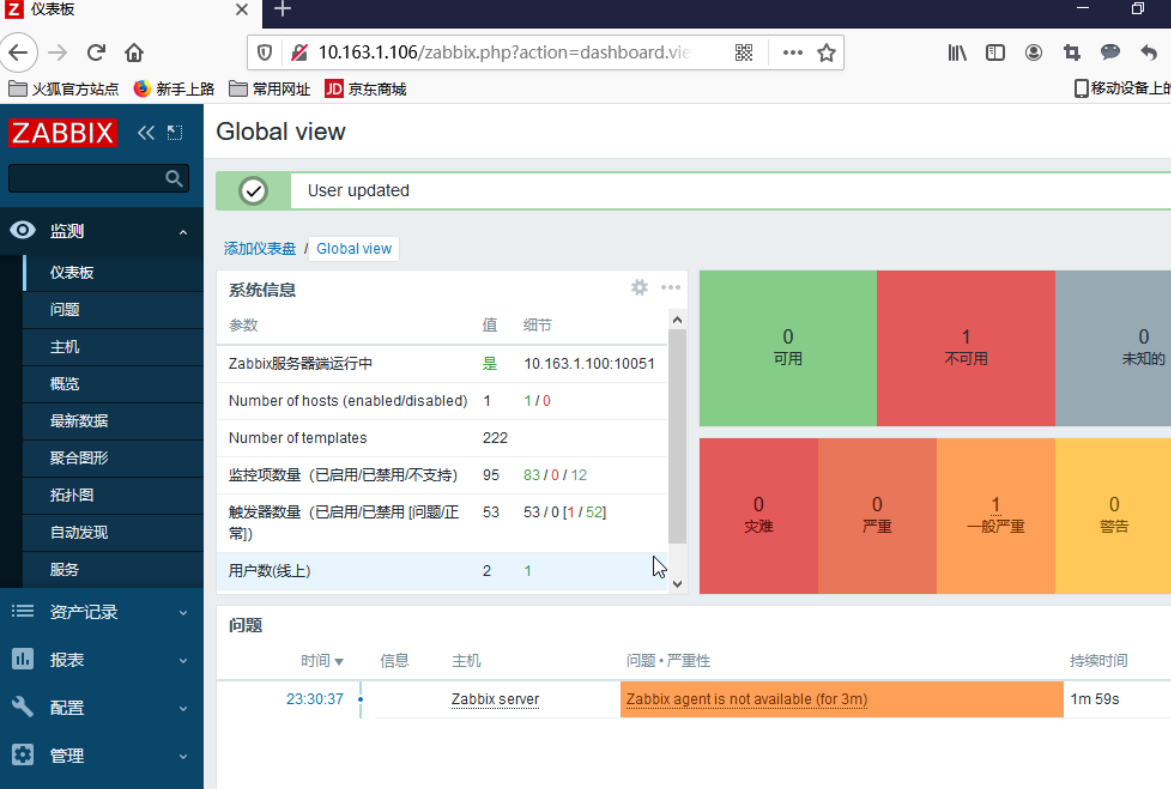
到此已经完成zabbix-allinone环境的安装
3、zabbix组件分离手工安装 1、拓扑
2、ip design 1 2 3 4 win:10.163.1.103
3、zabbix组件分离安装 1、基础配置 1 2 3 4 5 6 7 8 9 10 11 12 13 14 15 16 17 18 19 20 21 22 23 24 25 26 27 28 29 30 31 32 33 34 35 36 37 38 39 40 41 42 43 44 45 46 47 48 49 50 51 52 53 54 55 56 57 58 59 60 61 62 63 64 65 66 67 68 69 70 71 72 73 74 75 76 77 78 79 80 81 82 83 84 85 86 87 88 89 's/SELINUX=enforcing/SELINUX=disabled/g' /etc/selinux/configdisable firewalld --nowEND [BaseOS] name=baseos baseurl=https://mirrors.tuna.tsinghua.edu.cn/centos/8/BaseOS/x86_64/os/ gpgcheck=0 enabled=1 [AppStream] name=AppStream baseurl=https://mirrors.tuna.tsinghua.edu.cn/centos/8/AppStream/x86_64/os/ gpgcheck=0 enabled=1 [epel] name=epel baseurl=https://mirrors.tuna.tsinghua.edu.cn/epel/8/Everything/x86_64/ gpgcheck=0 enabled=1 [zabbix] name=zabbix baseurl=https://mirrors.tuna.tsinghua.edu.cn/zabbix/zabbix/5.0/rhel/8/x86_64/ gpgcheck=0 enabled=1 END 's/SELINUX=enforcing/SELINUX=disabled/g' /etc/selinux/configdisable firewalld --nowEND [BaseOS] name=baseos baseurl=https://mirrors.tuna.tsinghua.edu.cn/centos/8/BaseOS/x86_64/os/ gpgcheck=0 enabled=1 [AppStream] name=AppStream baseurl=https://mirrors.tuna.tsinghua.edu.cn/centos/8/AppStream/x86_64/os/ gpgcheck=0 enabled=1 [epel] name=epel baseurl=https://mirrors.tuna.tsinghua.edu.cn/epel/8/Everything/x86_64/ gpgcheck=0 enabled=1 [zabbix] name=zabbix baseurl=https://mirrors.tuna.tsinghua.edu.cn/zabbix/zabbix/5.0/rhel/8/x86_64/ gpgcheck=0 enabled=1 END 's/SELINUX=enforcing/SELINUX=disabled/g' /etc/selinux/configdisable firewalld --nowEND [BaseOS] name=baseos baseurl=https://mirrors.tuna.tsinghua.edu.cn/centos/8/BaseOS/x86_64/os/ gpgcheck=0 enabled=1 [AppStream] name=AppStream baseurl=https://mirrors.tuna.tsinghua.edu.cn/centos/8/AppStream/x86_64/os/ gpgcheck=0 enabled=1 [epel] name=epel baseurl=https://mirrors.tuna.tsinghua.edu.cn/epel/8/Everything/x86_64/ gpgcheck=0 enabled=1 [zabbix] name=zabbix baseurl=https://mirrors.tuna.tsinghua.edu.cn/zabbix/zabbix/5.0/rhel/8/x86_64/ gpgcheck=0 enabled=1 END
2、zabbix-db的安装 1 2 3 4 5 6 7 8 9 yum install mariadb-server zabbix-server-mysql -yenable mariadb --now"create database zabbix character set utf8 collate utf8_bin;" "grant all privileges on zabbix.* to zabbix@'%' identified by 'zabbix';" "grant all privileges on zabbix.* to zabbix@'10.163.1.106' identified by 'zabbix';" "grant all privileges on zabbix.* to zabbix@'10.163.1.100' identified by 'zabbix';" "flush privileges;" "use zabbix;" -e "show tables;"
3、zabbix-server的安装 1 2 3 4 yum install zabbix-server-mysql -y's/^# DBHost.*/DBHost=10.163.1.102/' /etc/zabbix/zabbix_server.conf's/^# DBPassword.*/DBPassword=zabbix/' /etc/zabbix/zabbix_server.confenable zabbix-server --now
4、zabbix-web的安装 1 2 3 4 5 6 7 8 9 10 11 yum install zabbix-web-mysql zabbix-nginx-conf -y's/^#.*listen.*/ listen 80;/' /etc/nginx/conf.d/zabbix.conf's/^#.*server_name.*/ server_name 10.163.1.106;/' /etc/nginx/conf.d/zabbix.conf's/; php_value\[date.timezone\] = Europe\/Riga/php_value\[date.timezone\] = Asia\/Shanghai/g' /etc/php-fpm.d/zabbix.confenable nginx php-fpm --now
4、shell脚本实现zabbix自动化安装 1、shell脚本的需求 shell脚本实现我们的zabbix自动化安装,我们需要安装zabiix-db、zabbix-server、zabbix-web,不同的zabbix组件所需的安装的软件包不同,修改的配置文件不同,组件的节点ip不同,组件的节点的主机名不同。
2、shell脚本流程 1、节点的基础配置 主机名、IP地址、地址掩码、网关、dns、软件仓库
2、软件安装 zabbix-db需要安装mariadb数据库、zabbix-server-mysql
zabbix-server需要安装zabbix-server-mysql
zabbix-web需要安装zabbix-web-mysql、zabbix-nginx-conf
3、配置文件修改 zabbix-db需要导入zabbix的数据库
zabbix-server需要配置zabbix-db的连接
zabbix-web需要修改nginx和php
4、启动服务 zabbix-db需要启动mariadb服务
zabbix-server需要启动zabbix-server服务
zabbix-web需要启动nginx和php-fpm服务
3、编写shell脚本 为了保证脚本的可扩展性,尽量将配置写成函数的形式,且对脚本的每一步操作检查。如果可能的话尽量在脚本中提供带颜色的输出,在脚本中加上备注。尽量选择额外的节点运行脚本来对组件进行部署。
1、zabbix.conf.php.template 1 2 3 4 5 6 7 8 9 10 11 12 13 14 15 16 17 18 19 <?php$DB ['TYPE' ] = 'MYSQL' ;$DB ['SERVER' ] = 'db_ip' ;$DB ['PORT' ] = '0' ;$DB ['DATABASE' ] = 'zabbix' ;$DB ['USER' ] = 'zabbix' ;$DB ['PASSWORD' ] = 'zabbix' ;$DB ['SCHEMA' ] = '' ;$DB ['ENCRYPTION' ] = false ;$DB ['KEY_FILE' ] = '' ;$DB ['CERT_FILE' ] = '' ;$DB ['CA_FILE' ] = '' ;$DB ['VERIFY_HOST' ] = false ;$DB ['CIPHER_LIST' ] = '' ;$DB ['DOUBLE_IEEE754' ] = true ;$ZBX_SERVER = 'server_ip' ;$ZBX_SERVER_PORT = '10051' ;$ZBX_SERVER_NAME = '' ;$IMAGE_FORMAT_DEFAULT = IMAGE_FORMAT_PNG;
2、zabbix-fuc.sh 1 2 3 4 5 6 7 8 9 10 11 12 13 14 15 16 17 18 19 20 21 22 23 24 25 26 27 28 29 30 31 32 33 34 35 36 37 38 39 40 41 42 43 44 45 46 47 48 49 50 51 52 53 54 55 56 57 58 59 60 61 62 63 64 65 66 67 68 69 70 71 72 73 74 75 76 77 78 79 80 81 82 83 84 85 86 87 88 89 90 91 92 93 94 95 96 97 98 99 100 101 102 103 104 105 106 107 108 109 110 111 112 113 114 115 116 117 118 119 120 121 122 123 124 125 126 127 128 129 130 131 132 133 134 135 136 137 138 139 140 141 142 143 #!/bin/bash function check if [ $? == 0 ]then echo -e "\033[32m${1} =====>success\033[0m" else echo -e "\033[31m${1} =====>fail \033[0m" fi function basic $web_pass ssh-copy-id root@$web_ip &>>/dev/null"设置zabbix-web的免密登录" $db_pass ssh-copy-id root@$db_ip &>>/dev/null"设置zabbix-db的免密登录" $server_pass ssh-copy-id root@$server_ip &>>/dev/null"设置zabbix-server免密登录" $web_ip rm -rf /etc/yum.repos.d/* &>>/dev/null"清空zabbix-web的软件仓库" $web_ip 'sed -i "s/^GSSAPIAuthentication.*/GSSAPIAuthentication no/" /etc/ssh/sshd_config' "优化zabbix-web的ssh连接" $db_ip rm -rf /etc/yum.repos.d/* &>>/dev/null"清空zabbix-db的软件仓库" $db_ip 'sed -i "s/^GSSAPIAuthentication.*/GSSAPIAuthentication no/" /etc/ssh/sshd_config' "优化zabbix-db的ssh连接" $server_ip rm -rf /etc/yum.repos.d/* &>>/dev/null"清空zabbix-server的软件仓库" $server_ip 'sed -i "s/^GSSAPIAuthentication.*/GSSAPIAuthentication no/" /etc/ssh/sshd_config' "优化zabbix-server的ssh连接" $web_ip 'systemctl restart sshd' $db_ip 'systemctl restart sshd' $server_ip 'systemctl restart sshd' END [BaseOS] name=baseos baseurl=https://mirrors.tuna.tsinghua.edu.cn/centos/8/BaseOS/x86_64/os/ gpgcheck=0 enabled=1 [AppStream] name=AppStream baseurl=https://mirrors.tuna.tsinghua.edu.cn/centos/8/AppStream/x86_64/os/ gpgcheck=0 enabled=1 [epel] name=epel baseurl=https://mirrors.tuna.tsinghua.edu.cn/epel/8/Everything/x86_64/ gpgcheck=0 enabled=1 [zabbix] name=zabbix baseurl=https://mirrors.tuna.tsinghua.edu.cn/zabbix/zabbix/5.0/rhel/8/x86_64/ gpgcheck=0 enabled=1 END "生成仓库文件" $web_ip :/etc/yum.repos.d/a.repo &>>/etc/null"设置zabbix-web的仓库" $db_ip :/etc/yum.repos.d/a.repo &>>/etc/null"设置zabbix-db的仓库" $server_ip :/etc/yum.repos.d/a.repo &>>/etc/null"设置zabbix-server的仓库" $web_ip "sed -i 's/SELINUX=enforcing/SELINUX=disabled/g' /etc/selinux/config && setenforce 0 && systemctl disable firewalld --now && hostnamectl set-hostname $web_host " &>>/dev/null"关闭zabbix-web的selinux和防火墙、设置主机名" $db_ip "sed -i 's/SELINUX=enforcing/SELINUX=disabled/g' /etc/selinux/config && setenforce 0 && systemctl disable firewalld --now && hostnamectl set-hostname $db_host " &>>/dev/null"关闭zabbix-db的selinux和防火墙、设置主机名" $server_ip "sed -i 's/SELINUX=enforcing/SELINUX=disabled/g' /etc/selinux/config && setenforce 0 && systemctl disable firewalld --now && hostnamectl set-hostname $server_host " &>>/dev/null"关闭zabbix-server的selinux和防火墙、设置主机名" function zabbix_db $db_ip yum -y install mariadb-server zabbix-server-mysql &>>/dev/null"zabbix-db软件包安装" $db_ip 'systemctl enable mariadb --now' &>>/dev/null"启动数据库" $db_ip 'mysql -e "create database zabbix character set utf8 collate utf8_bin;"' &>>/dev/null"zabbix-db上创建zabbix的数据库" $db_ip "mysql -e \"grant all privileges on zabbix.* to zabbix@'%' identified by 'zabbix';\"" &>>/dev/null"为zabbix用户对zabbix数据库的权限" $db_ip "mysql -e \"grant all privileges on zabbix.* to zabbix@'$web_ip ' identified by 'zabbix';\"" &>>/dev/null"为zabbix用户对zabbix数据库的权限" $db_ip "mysql -e \"grant all privileges on zabbix.* to zabbix@'$server_ip ' identified by 'zabbix';\"" &>>/dev/null"为zabbix用户对zabbix数据库的权限" $db_ip 'mysql -e "flush privileges;"' &>>/dev/null"zabbix-db刷新数据库权限" $db_ip "zcat /usr/share/doc/zabbix-server-mysql/create.sql.gz | mysql -uzabbix -pzabbix zabbix" &>>/dev/null"zabbix-db上导入zabbix模板数据库" $db_ip 'mysql -uzabbix -pzabbix -e "use zabbix;" -e "show tables;"' &>>/dev/null"zabbix-db测试" function zabbix_server "ssh root@$server_ip " $sshserver yum install zabbix-server-mysql -y &>>/dev/null"zabbix-server安装软件" $sshserver "sed -i 's/^# DBHost.*/DBHost=$db_ip /' /etc/zabbix/zabbix_server.conf" &>>/dev/null"zabbix-server修改配置文件" $sshserver "sed -i 's/^# DBPassword.*/DBPassword=zabbix/' /etc/zabbix/zabbix_server.conf" &>>/dev/null"zabbix-server修改配置文件" $sshserver "systemctl enable zabbix-server --now" &>>/dev/null"zabbix-server服务启动" function zabbix_web "ssh root@$web_ip " $sshweb yum install zabbix-web-mysql zabbix-nginx-conf -y &>>/dev/null"zabbix-web安装软件" $sshweb "sed -i 's/^#.*listen.*/ listen 80;/' /etc/nginx/conf.d/zabbix.conf" &>>/dev/null"zabbix-web修改监听端口" $sshweb "sed -i 's/^#.*server_name.*/ server_name $web_ip ;/' /etc/nginx/conf.d/zabbix.conf" &>>/dev/null"zabbix-web编写servername" $sshweb "sed -i 's/; php_value\[date.timezone\] = Europe\/Riga/php_value\[date.timezone\] = Asia\/Shanghai/g' /etc/php-fpm.d/zabbix.conf" &>>/dev/null"zabbix-web修改时间" $sshweb yum install -y langpacks-zh_CN.noarch glibc-common.x86_64 &>>/dev/null"zabbix-web安装语言包" $sshweb "systemctl enable nginx php-fpm --now" &>>/dev/null"zabbix-web安装语言包" function zabbix_tem "s/db_ip/$db_ip /" | sed "s/server_ip/$server_ip /" > .zabbix.conf.php "生成php配置文件" $web_ip :/etc/zabbix/web/zabbix.conf.php &>>/dev/null"复制php配置文件" $sshweb "chown apache:apache /etc/zabbix/web/zabbix.conf.php && chmod 600 /etc/zabbix/web/zabbix.conf.php" &>>/dev/null"修改php配置文件权限"
3、zabbix-var.sh 1 2 3 4 5 6 7 8 9 10 11 12 13 14 15 #!/bin/bash
4、zabbix-install.sh 1 2 3 4 5 6 7 8 9 10 11 12 #!/bin/bash source zabbix-fuc.shsource zabbix-var.shfunction main
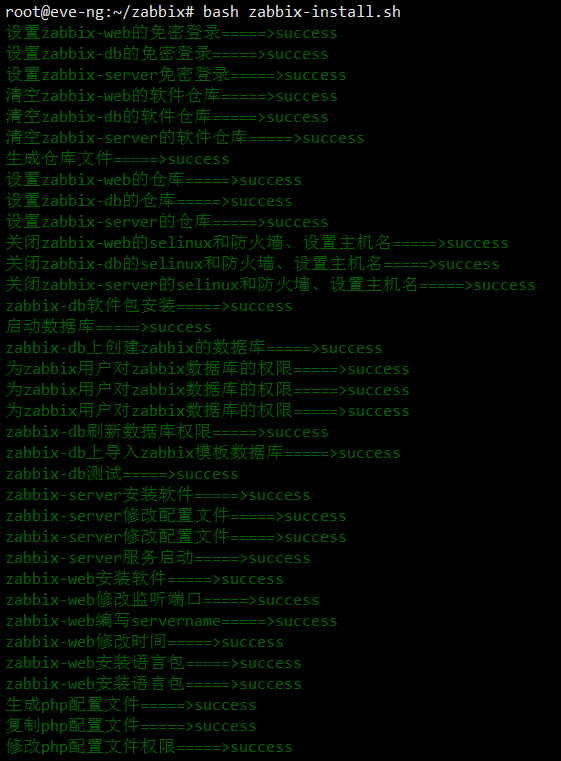
5、测试
测试成功
5、在被监控主机上安装zabbix-agent 1、配置软件仓库 1 2 3 4 5 6 7 8 9 10 11 12 13 14 15 16 17 18 19 20 21 22 23 rm -rf /etc/yum.repos.d/*END [BaseOS] name=baseos baseurl=https://mirrors.tuna.tsinghua.edu.cn/centos/8/BaseOS/x86_64/os/ gpgcheck=0 enabled=1 [AppStream] name=AppStream baseurl=https://mirrors.tuna.tsinghua.edu.cn/centos/8/AppStream/x86_64/os/ gpgcheck=0 enabled=1 [epel] name=epel baseurl=https://mirrors.tuna.tsinghua.edu.cn/epel/8/Everything/x86_64/ gpgcheck=0 enabled=1 [zabbix] name=zabbix baseurl=https://mirrors.tuna.tsinghua.edu.cn/zabbix/zabbix/5.0/rhel/8/x86_64/ gpgcheck=0 enabled=1 END
2、安装zabbix-agent 1 yum install -y zabbix-agent
3、修改zabbix-agent配置文件 zabbix-server通过agent获取数据有两种方式,一种是agent端主动发送数据到server端,我们称之为主动模式;agent端等待数据被提取,叫做被动模式。两种模式可以一起配置,并不冲突。
1 2 3 4 5 sed -i 's/^Server=.*/Server=10.163.1.100/' /etc/zabbix/zabbix_agentd.conf's/^ServerActive=.*/ServerActive=10.163.1.100/' /etc/zabbix/zabbix_agentd.confenable zabbix-agent --now
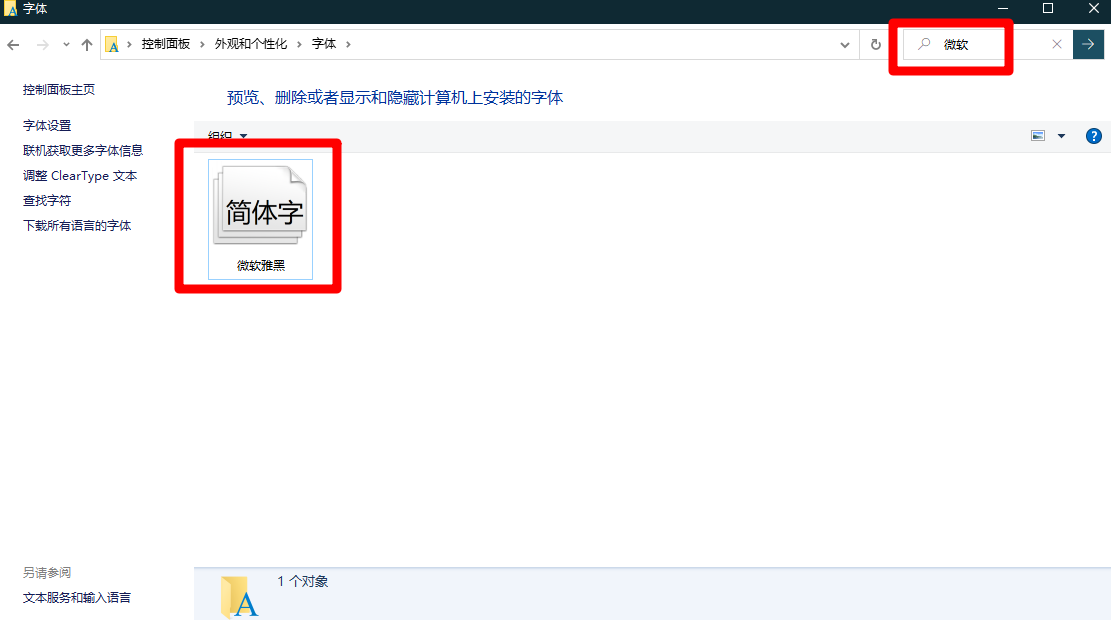
6、在zabbix-web上替换字体 在windows主机上查找字体(控制面板—>搜字体—->搜微软)
复制这个字体到zabbix-web上
1 2 3 4 5 6 cp msyhbd.ttc /usr/share/zabbix/assets/fonts/"s/^define('ZBX_GRAPH_FONT_NAME'.*/define('ZBX_GRAPH_FONT_NAME', '拷贝过来的文件名(不带后缀名)');/" /usr/share/zabbix/include/defines.inc.php
7、在zabbix-server上配置邮件客户端 1、安装sendmail和mailx软件 1 yum install sendmail mailx -y
2、开启sendmail服务 1 systemctl enable sendmail --now
3、配置sendmail客户端配置文件 1 2 3 4 5 6 7 8 cat > /etc/mail.rc << END set bsdcompat set from=#自己的邮箱@163.com set smtp=smtp.163.com set [email protected] set smtp-auth-password=#邮箱授权码 set smtp-auth=login EDN
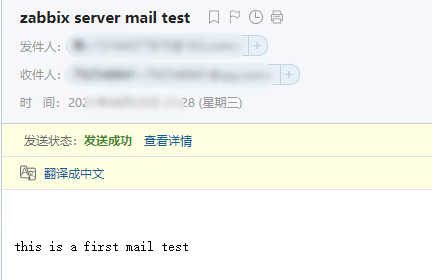
4、测试邮件的发送 1 echo "this is a first mail test" | mail -s 'zabbix server mail test'
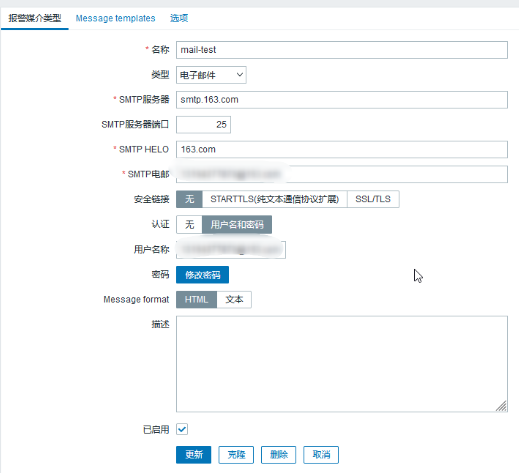
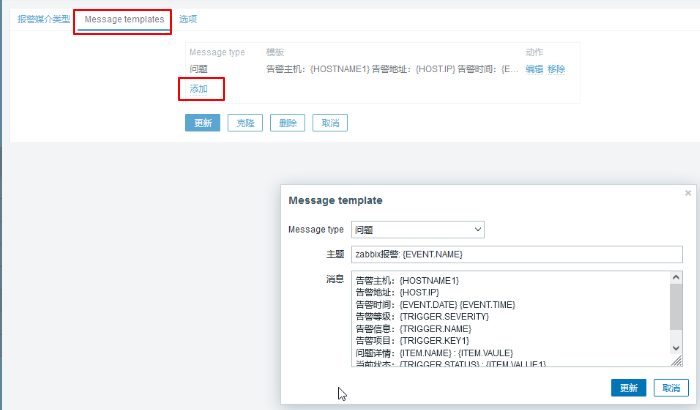
5、添加报警媒介
6、添加消息模板
1 2 3 4 5 6 7 8 9 告警主机:{HOSTNAME1}
8、zabbix系统自带监控项详解 1、在agent端列出系统里面自带的监控项 1 2 3 4 5 6 7 8 9 10 11 12 13 14 15 16 17 18 19 20 21 22 23 24 zabbix_agentd -p"{#IFNAME}" :"eth2" },{"{#IFNAME}" :"eth3" },{"{#IFNAME}" :"eth0" },{"{#IFNAME}" :"lo" },{"{#IFNAME}" :"eth1" }]]
9、zabbix使用模板实现监控网络设备 1、拓扑
1 2 3 4 5 6 7 8 9 10 11
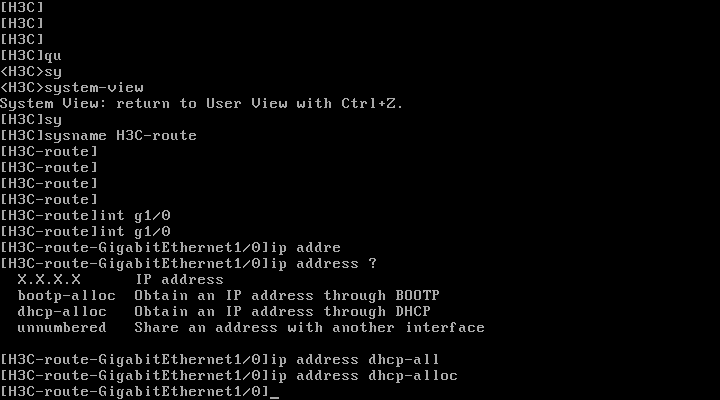
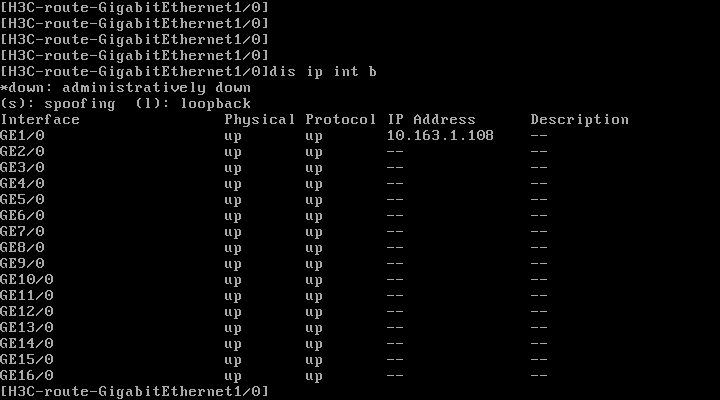
2、在H3C的route上配置snmp
1 2 3 4 5 6 7 8 9 10 read public
3、在cisco的swich上配置telnet和snmp 1 2 3 4 5 6 7 8 9 10 11 12 13 14 15 16 17 18 19 enable
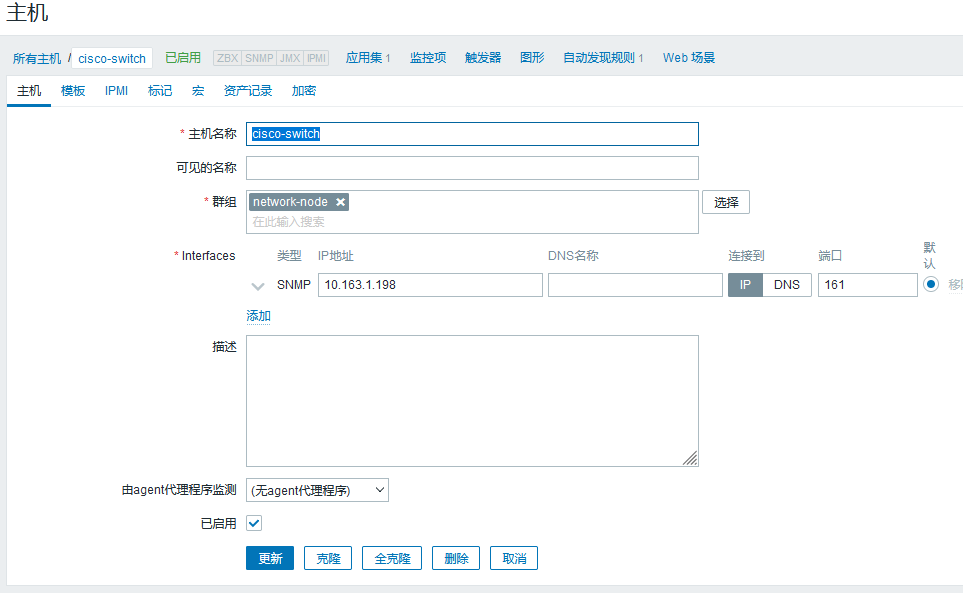
4、在zabbix-web上添加网络节点
